
Separate the source range from your chosen scenario
The linked guide gives one in-row figure, 6 inches, and one between-row figure, 12 inches. Treat these as the reference spacing for retained plants. Sowing seed more thickly and thinning to a final stand are different quantities, so a seed count or sowing rate should not be read as the number of plants you keep.
For a clearly labeled planning scenario, this guide uses the 6-inch in-row centers. That choice matches the source figure; it is not a claim that every garden, raised bed or variety must use it. Record the spacing you actually choose so the count and the planting plan agree.
- Write down the in-row spacing you are using and label it as the source figure or your own choice.
- Note the between-row spacing separately; it is not set by the in-row count.
- Keep sowing quantities and retained-plant counts in separate notes.
Source context: Utah State University Extension
Count retained plants in one measured row
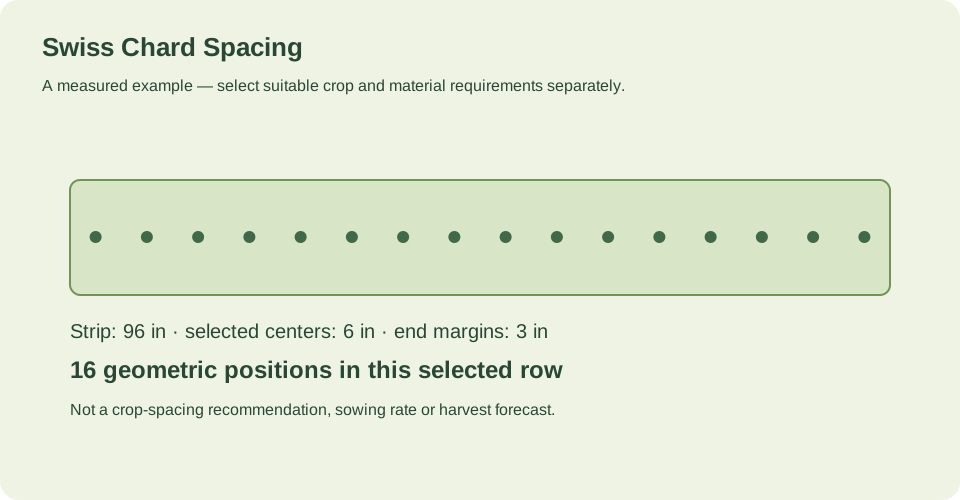
The worked example is geometrical: a 96-inch row with 6-inch centers and a 3-inch margin at each end. The first center falls at 3 inches and the last at 93 inches, giving 16 counted positions. The counted item is retained plants, meaning the final plants you intend to keep in that row, not seeds sown and not seedlings that emerge.
This example shows how length, center interval and end margins produce a count. It does not establish a spacing recommendation beyond the linked guide figure, and it does not describe a full bed. The linked row calculator can count this exact length, center interval and both end margins in inches or centimeters.
- Measure the row length along the line where plants will sit.
- Choose the center interval and both end margins, then enter them in the same units.
- Check that the first and last centers fall inside the row before accepting the count.
- Label the result as retained plants for that row only.
Source context: Utah State University Extension
What one row does not decide
A single row count does not set your whole garden layout. Access paths, bed edges, adjacent rows, supports or trellises, and the mature habit of the plants must be chosen separately. The linked guide gives a between-row figure of 12 inches, but it does not specify path widths, bed dimensions or support structures, so those decisions need their own measurements and reasoning.
If you plan several rows, count each row on its own and then check the space between rows against the figure you have chosen. Do not multiply one row count by a guessed number of rows without measuring the actual bed.
- Sketch the bed outline and mark access space before placing rows.
- Set between-row spacing from the source figure or your own recorded choice.
- Count each row separately rather than scaling one row count across the bed.
- Check supports or mature plant habit against the space you have marked.
Source context: Utah State University Extension
Mark and verify the retained plants
Once the count is set, mark the planned centers in the row so sowing and thinning lead toward the final stand. Because sowing rate and retained plants differ, thinning notes should state the target count for that row. Recheck the measured length and margins after marking, since a changed end margin shifts the first and last positions.
- Mark each planned center along the measured row.
- Record the target retained-plant count on the row label.
- Re-measure after any change to row length or end margins and recount.
Source context: Utah State University Extension
Check your measured example
One measured 96-inch row, with selected 6-inch centers and 3-inch margins at both ends. Count 16 retained plants.
Reference and growing system: USU gives Swiss chard plants 6 inches apart within rows 12 inches apart. Sowing rate and final retained plants are different quantities.
| Quantity | Calculated result |
|---|---|
| Usable row length (in) | 96 |
| Selected center spacing (in) | 6 |
| Margin at each row end (in) | 3 |
| Positions in this row | 16 |
| First center from row start (in) | 3 |
| Last center from row start (in) | 93 |
| What is being counted | retained plants |
The example uses a 96-inch row, 6-inch centers and 3-inch margins at both ends. The first center is at 3 inches and the last at 93 inches, producing 16 retained-plant positions. This is a geometrical illustration of the spacing figure, not crop advice for a whole bed or a sowing rate.
Count this row in the spacing calculator ↗Example inputs explain the method. Review the source context, chosen cultivar and actual site before planting or ordering.
Your before-you-plant checklist
- In-row spacing recorded and labeled as the source figure or your own choice
- Between-row spacing recorded separately from the in-row count
- Row length measured along the planting line
- End margins entered in the same units as the row length
- Count labeled as retained plants for that row only
- Access, supports and adjacent rows checked separately from the row count
Questions that come up while planning
How far apart should Swiss chard plants be?
The USU figure is 6 inches apart within rows and 12 inches apart between rows. Those are retained-plant spacings, not a sowing rate.
Does the 16-plant example apply to my whole garden?
No. It is a geometrical count for one 96-inch row with 6-inch centers and 3-inch end margins. Other rows and the space between them must be planned separately.
Should I count seeds or final plants?
Count final retained plants when planning spacing. Sowing rate and retained plants are different quantities, so seed amounts should be tracked separately from the stand you intend to keep.
Sources & method
Horticultural guidance is linked to its original source and regional context. Geometry and unit conversions are calculated separately. Read how we prepare and check a page.
- How to Grow Swiss Chard in Your GardenUtah State University Extension