
Map Sunlight and Wind Before You Place Pots
Walk the balcony at several times of day and note where sun reaches the floor and railing. Record the hours each zone receives direct light and whether nearby buildings or overhangs shade it. This map tells you which spots suit sun-loving vegetables and which stay shaded.
Wind matters on balconies because exposure can be stronger than at ground level. Note gusty corners, funnel-like gaps and spots where pots could tip. Plan heavier pots low and out of the strongest airflow, and keep tall plants away from exposed edges. Check any railing or attachment idea with the building manager rather than assuming it is allowed or safe.
- Sketch the balcony and mark sun and shade at morning, midday and afternoon.
- Note windy corners and any spot where a pot could be knocked or tipped.
- Decide which zones are practical for pots before buying plants.
Source context: University of Maryland Extension
Plan Water Access and Runoff
Watering needs vary with weather, plant growth and growing medium, so a fixed schedule rarely fits a whole season. Plan how you will carry water to the balcony and where you will fill a watering can or container. Self-watering designs have different water-reservoir arrangements, so read how your specific container is filled and checked.
Runoff needs a route. Pots usually release excess water, and saucers or trays can catch it, but standing water and overflow still need managing. Decide where drainage water will go and whether the balcony floor or the space below could be affected. Keep the plan simple enough that you can water and check runoff regularly.
- Identify your water source and the route you will carry water.
- Choose trays or saucers that fit each pot and plan where overflow will go.
- Read the filling and checking instructions for any self-watering container you use.
Source context: University of Maryland Extension
Measure Usable Floor Space
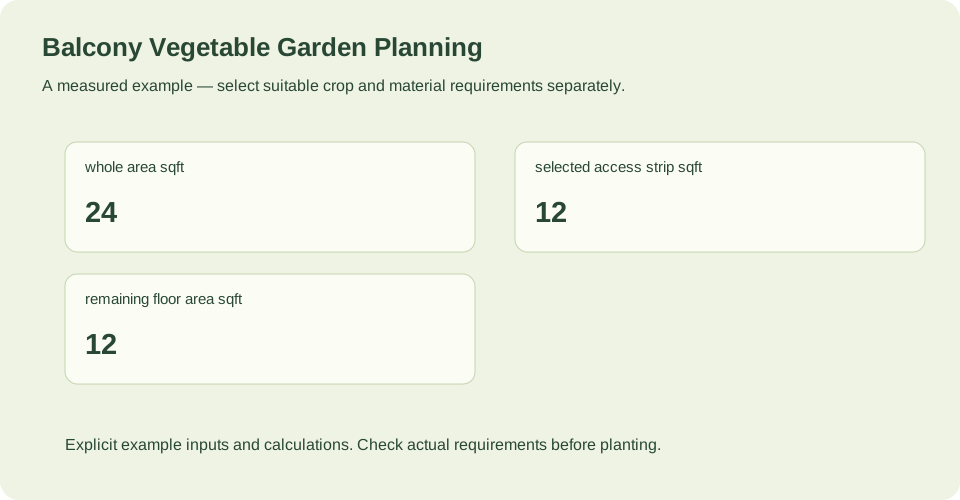
Measure the balcony floor and subtract the space you need to stand, reach pots and move safely. The supplied example is a floor-space illustration only: a 6 by 4 ft area is 24 sq ft, and a user-selected 6 by 2 ft access strip is 12 sq ft, leaving 12 sq ft of remaining floor area. That arithmetic says nothing about structural load capacity, legal clearances or safe railing attachment.
Use the same approach on your own balcony: measure the whole area, decide how much access space you need, and treat the remainder as a planning figure rather than a promise that every square foot can hold a pot. A generic square grid is not a garlic paired-row or tomato growing recommendation, so place pots according to your measured space and the needs of each plant.
- Measure the balcony floor and record the total area.
- Mark the access strip you need for standing and reaching.
- Subtract the access strip to find remaining floor area, then check pot placement against it.
Source context: University of Maryland Extension
Check Loads With the Building Manager
Wet potting mix and pots create loads, and those loads add up across a balcony. Ask the building manager for the specific limit that applies to your balcony. Do not estimate structural capacity from the weight of an empty pot or from a floor-area calculation.
Keep a simple record of each pot, its size and what it holds, and share that with the building manager if you need guidance. If the limit is unclear, pause before adding more weight. The goal is a plan you can check, not a guess about what the balcony can bear.
- Ask the building manager for the specific load limit for your balcony.
- List each pot and its contents so you can discuss the total with the manager.
- Do not add more weight until the limit is confirmed.
Source context: University of Maryland Extension
Check your measured example
Balcony floor-space illustration only: a 6 × 4 ft area and a user-selected 6 × 2 ft access strip. The result says nothing about structural load capacity, legal clearances or safe railing attachment.
| Quantity | Calculated result |
|---|---|
| whole area sqft | 24 |
| selected access strip sqft | 12 |
| remaining floor area sqft | 12 |
The example is a floor-space illustration only: a 6 by 4 ft balcony area is 24 sq ft, a user-selected 6 by 2 ft access strip is 12 sq ft, and the remaining floor area is 12 sq ft. It does not indicate structural load capacity, legal clearances or safe railing attachment.
Example inputs explain the method. Review the source context, chosen cultivar and actual site before planting or ordering.
Your before-you-plant checklist
- Sun and shade mapped at several times of day.
- Windy spots and tipping risks noted.
- Water source and carrying route identified.
- Runoff route and trays planned for each pot.
- Building manager asked for the specific load limit.
Questions that come up while planning
How do I plan watering for balcony vegetables?
Plan water access first, then expect watering needs to vary with weather, plant growth and growing medium. Check how your specific container is filled and whether it is self-watering, since reservoir arrangements differ.
Can I use floor area to decide how many pots fit?
Floor area helps you plan access and placement, but it does not establish structural load capacity. Ask the building manager for the specific limit and never infer capacity from empty-pot weight.
What should I do about runoff on a balcony?
Plan where excess water will go before placing pots. Use trays or saucers that fit your containers, and check that overflow will not create a problem on the floor or below.
Sources & method
Horticultural guidance is linked to its original source and regional context. Geometry and unit conversions are calculated separately. Read how we prepare and check a page.
- Growing Vegetables in Containers and Salad TablesUniversity of Maryland Extension